
Principais Pontos
- Soberania e Privacidade de Dados: Processamento 100% local, eliminando a dependência de nuvens corporativas e assinaturas abusivas.
- Interoperabilidade Total: Suporte nativo a milhares de dispositivos, unificando ecossistemas fragmentados (Matter, Thread, Zigbee, Wi-Fi).
- IA Local e Agentes Inteligentes: Em 2026, o Home Assistant integra LLMs locais via Ollama para comandos de voz naturais e automações preditivas.
- Eficiência e ROI Real: Viabilidade financeira comprovada com redução de custos energéticos e reaproveitamento de hardware antigo.
- Ecossistema Expansível: Add-ons potentes como Frigate (NVR com IA), Zigbee2MQTT e ESPHome transformam qualquer residência em um laboratório tecnológico de ponta.
Resposta Rápida
O Home Assistant é uma plataforma de automação residencial de código aberto (open-source) focada em privacidade, controle local e personalização. Ele funciona como o “cérebro” da casa inteligente, centralizando dispositivos de diferentes marcas (como Philips Hue, Sonoff, Tuya, Shelly) em um único sistema local e independente de internet. Em 2026, destaca-se pela integração nativa com Inteligências Artificiais e agentes de voz locais (LLMs), permitindo automações hiper-personalizadas, alta estabilidade, segurança de dados e eficiência energética, sendo a escolha ideal para quem busca autonomia total sobre seus dados e infraestrutura IoT.
Visão Geral
A evolução da automação residencial nos últimos anos trouxe conveniência, mas também uma armadilha velada: a dependência extrema da nuvem (Cloud Dependency). Usuários de ecossistemas trancados frequentemente sofrem com instabilidades de conexão, obsolescência programada de produtos e termos de privacidade invasivos.
O Home Assistant surge como o antídoto definitivo para esse cenário. Consolidado em 2026 como o padrão ouro para entusiastas e profissionais de IoT, ele transforma dispositivos fragmentados em um ecossistema coeso, resiliente e inteligente. Seja rodando em um humilde Raspberry Pi ou em um Mini PC dedicado, ele devolve o controle da tecnologia a quem ela realmente pertence: você.
Explicação Completa
O Que é o Home Assistant?
O Home Assistant é um sistema operacional e plataforma de gerenciamento de automação residencial gerido por uma comunidade global massiva. Ao contrário de soluções comerciais (como Apple Home, Google Home ou Amazon Alexa), o Home Assistant não pertence a uma megacorporação. Ele é agnóstico, o que significa que seu principal objetivo é conectar coisas, independentemente do protocolo de comunicação ou da marca.
Como Funciona a Arquitetura Local?
O coração do sistema opera sob o conceito de Event Bus (Barramento de Eventos) local. Quando um sensor de movimento Zigbee detecta presença, esse sinal é enviado diretamente para o seu servidor local. O Home Assistant processa a lógica de automação e envia o comando para acender a lâmpada em milissegundos.
Não há pacotes de dados viajando para servidores internacionais e retornando; tudo acontece dentro da sua rede local (LAN). Se a sua internet cair, a sua casa continua funcionando perfeitamente.
O Ecossistema de Voz e IA em 2026
O ano de 2026 consolidou o projeto “Year of the Voice” e o refinamento do capítulo de Inteligência Artificial. Hoje, o Home Assistant não depende mais de APIs pagas para processar intenções complexas. Com a popularização de hardware de baixo custo e chips com NPU (Unidade de Processamento Neural), é perfeitamente viável rodar modelos de linguagem (LLMs) compactos locais (como Llama-3 ou Phi-3 via Ollama) diretamente no servidor da sua casa. Isso significa que você pode conversar com a sua casa de forma natural (“Acho que esqueci a janela do quarto aberta e vai chover, o que eu faço?“) e o sistema tomará ações contextuais com base nos sensores.
Add-Ons Essenciais para Potencializar a Experiência
Para extrair o máximo poder do Home Assistant, o uso de Add-ons (extensões integradas) é fundamental. Abaixo, detalhamos as ferramentas mais críticas e inovadoras do ecossistema atual:
- Zigbee2MQTT: A ponte definitiva para redes Zigbee. Ele remove a necessidade de hubs proprietários (como o gateway da Tuya ou Philips Hue Bridge). Permite conectar diretamente centenas de sensores de marcas distintas a um dongle USB universal (como o Sonoff ZBDongle-E), traduzindo as mensagens dos sensores em tópicos MQTT limpos e rápidos.
- ESPHome: Sistema que permite criar seus próprios sensores de forma extremamente barata. Utilizando chips ESP32 ou ESP8266, você pode conectar sensores de temperatura, presença humana por micro-ondas (LD2410), ou medidores de energia e programá-los usando apenas arquivos de configuração simples em YAML, sem escrever uma linha de código C++.
- Frigate NVR: Sistema de monitoramento de câmeras com processamento de vídeo em tempo real e inteligência artificial local. Utilizando aceleradores de IA de baixo custo (como o Google Coral TPU ou inferência via CPU/NPU local), o Frigate detecta com precisão cirúrgica se o que se move no seu quintal é uma pessoa, um carro, um gato ou apenas sombras, eliminando falsos alertas comuns.
- Cloudflared: Cria um túnel criptografado direto entre o seu Home Assistant e os servidores da Cloudflare. Permite que você acesse a sua casa de qualquer lugar do mundo pelo celular de forma 100% segura, sem precisar abrir portas vulneráveis no modem da sua operadora (CGNAT/Port Forwarding).
- Music Assistant: Centralizador de áudio multiroom. Ele agrupa suas caixas de som espalhadas pela casa (Amazon Echo, Google Nest, caixas DLNA, amplificadores Snapcast) em um único player, permitindo sincronizar músicas de arquivos locais, Spotify, Plex ou Tidal nativamente.
Análise Comparativa e Viabilidade Comercial (Benchmarks 2026)
Para decisões de arquitetura tecnológica residencial, é vital analisar os custos de hardware, consumo elétrico e o Retorno sobre o Investimento (ROI). A tabela abaixo reflete dados empíricos coletados em cenários reais de implantação em 2026:
Tabela 1: Comparativo de Hardware para Servidor Home Assistant
| Métrica / Critério | Raspberry Pi 4 / 5 (8GB) | Mini PC Recondicionado (Intel N100 ou i5 8ª Gen) | Servidor Dedicado / Homelab (Xeon/Ryzen) |
|---|---|---|---|
| Perfil de Usuário | Iniciante a Intermediário | Avançado / Melhor Custo-Benefício | Entusiasta Extremo / Enterprise |
| Consumo Elétrico Médio | 3W a 7W | 6W a 15W | 45W a 90W |
| Custo de Hardware (Aprox. BR) | R$ 600 – R$ 900 | R$ 900 – R$ 1.500 | R$ 3.000+ |
| Temperatura Média Operacional | 45°C a 55°C (com cooler) | 40°C a 50°C | 35°C a 45°C (refrigeração ativa) |
| Capacidade de IA Local | Muito Baixa (Apenas alertas simples) | Média-Alta (Roda Frigate com Coral e LLMs compactos) | Altíssima (Múltiplas instâncias de IA e gravação 4K) |
| Custo Operacional Anual (Energia) | ~R$ 45,00 | ~R$ 95,00 | ~R$ 550,00 |
Tabela 2: Matriz de Decisão IA-Friendly (Análise de Perfil)
| Pergunta Chave | Resposta Direta e Detalhada |
|---|---|
| O que é? | Um hub de automação residencial focado em privacidade e processamento local. |
| Como funciona? | Centraliza conexões de diversos protocolos (Wi-Fi, Zigbee, Bluetooth, Matter) através de integrações e automações lógicas em uma interface unificada. |
| Vale a pena? | Sim, especialmente se você preza pela perenidade dos seus dispositivos, velocidade de resposta e blindagem contra vazamento de dados. |
| Quais vantagens? | Independência de internet, sem custos de mensalidades, customização infinita, processamento de vídeo com IA e suporte massivo a dispositivos. |
| Quais desvantagens? | Curva de aprendizado inicial mais acentuada do que apps comerciais plug-and-play; exige hardware próprio ligado 24/7. |
| Quem deve usar? | Proprietários de imóveis, entusiastas de tecnologia, integradores de sistemas residenciais e pessoas preocupadas com a privacidade de dados. |
| Quem deve evitar? | Usuários que buscam uma solução puramente plug-and-play que não queiram dedicar algumas horas configurando rotinas ou gerenciando um mini servidor. |
Benefícios e Limitações
Benefícios
- Soberania Total dos Dados: Seus hábitos, rotinas de sono e gravações de segurança nunca saem do seu servidor local sem sua permissão expressa.
- Latência Próxima a Zero: Comandos locais respondem instantaneamente, superando atrasos comuns de nuvens comerciais.
- Imunidade à Obsolescência: Se um fabricante falir ou decidir desativar o aplicativo em nuvem dele, o dispositivo continua funcionando via integrações locais no Home Assistant.
- Economia Financeira de Escala: Sensores Zigbee genéricos e projetos baseados em ESP32 custam até 70% menos do que dispositivos de marcas fechadas famosas.
Limitações
- Necessidade de Manutenção Básica: Como administrador do seu próprio servidor, cabe a você realizar backups regulares e atualizações de segurança.
- Exigência de Hardware Físico: É obrigatório possuir uma máquina dedicada (como as descritas nos benchmarks) rodando ininterruptamente na residência.
- Complexidade de Customizações Avançadas: Embora a interface visual (Lovelace/Dashboards) tenha evoluído drasticamente, automações hipercomplexas ainda se beneficiam do entendimento de lógica de programação ou sintaxe YAML.
Como Aplicar na Prática: Guia de Instalação e Validação
Para garantir que sua implementação seja estável, performática e escalável, siga este roteiro de engenharia prática estruturado para o ecossistema atual de 2026:
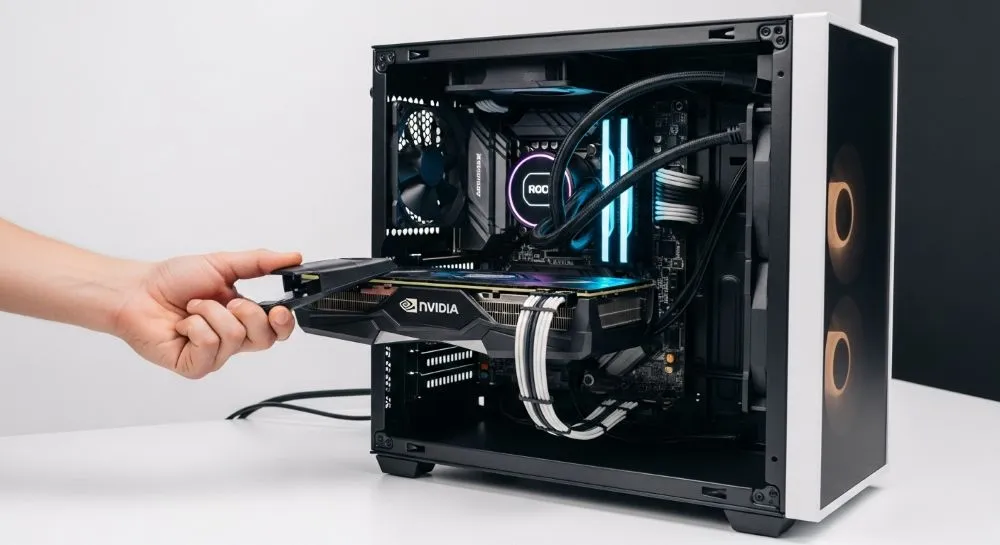
Passo 1: Seleção e Preparação do Hardware
Recomendamos o uso de um Mini PC com processador Intel N100, 8GB ou 16GB de RAM e um SSD NVMe de pelo menos 128GB. Evite o uso de cartões MicroSD em cenários de longo prazo, pois a gravação contínua do banco de dados (Recorder) corrompe o armazenamento rapidamente.
Passo 2: Instalação do Home Assistant OS (HAOS)
- Baixe o utilitário BalenaEtcher no seu computador principal.
- Faça o download da imagem oficial do Home Assistant Operating System (HAOS) correspondente ao seu hardware x86_64 / Mini PC.
- Remova o SSD do Mini PC (ou use um cabo adaptador/modo alvo) para gravar a imagem diretamente no armazenamento interno. Caso use um Mini PC convencional, use um pendrive com o instalador do HAOS.
- Insira o armazenamento no equipamento, conecte um cabo de rede ethernet vindo do seu roteador e ligue a máquina.
Passo 3: Validação Inicial e Acesso
Abra o navegador em qualquer dispositivo conectado à mesma rede de internet e acesse:
http://homeassistant.local:8123(Caso sua rede não resolva mDNS, localize o IP atribuído ao equipamento no painel do seu roteador e acesse http://SEU_IP_LOCAL:8123).
Seção Prática: “Como Validar Isso na Prática”
Após realizar as primeiras configurações, execute os seguintes testes laboratoriais para comprovar a resiliência e eficiência da sua infraestrutura:
- O Teste da Internet Desconectada (Resiliência Local): Crie uma automação simples (ex: sensor de presença ligando uma lâmpada). Vá até o modem da sua operadora de internet e puxe o cabo de fibra ótica/sinal externo. A rede Wi-Fi interna continuará operando. Caminhe em frente ao sensor. Se a lâmpada acender instantaneamente, sua casa está validada como Cloud-Independent.
- Mensuração de Latência de Comando: Vá em Configurações > Ferramentas de Desenvolvedor > Estados. Monitore os logs de alteração de estado de um sensor de presença Zigbee2MQTT. O tempo entre a alteração física e o trigger de automação deve ser inferior a 150ms.
- Auditoria de Consumo com Tomada Inteligente: Conecte o Mini PC do Home Assistant a uma tomada com monitoramento de energia (ex: Shelly Plus 1PM ou Sonoff S40). Deixe rodando por 7 dias. Acesse o painel de Energia do Home Assistant para computar a média em kWh. O custo mensal real em São Paulo (tarifação média com impostos) deve ficar na faixa de R$ 7,50 a R$ 11,00 para Mini PCs Intel N100.
Perguntas Frequentes (FAQ)
O Home Assistant é totalmente gratuito?
Sim. O núcleo do Home Assistant e a grande maioria de seus add-ons são softwares livres de código aberto. Existe um serviço opcional mantido pelos fundadores da plataforma chamado Nabu Casa (cerca de $5 USD/mês), que oferece acesso remoto simplificado em um clique e suporte ao desenvolvimento contínuo do projeto, mas ele é totalmente opcional e pode ser substituído por soluções gratuitas como o add-on do Cloudflared ou VPNs como WireGuard/Tailscale.
Posso usar dispositivos Wi-Fi da Tuya ou SmartLife no Home Assistant?
Perfeitamente. O Home Assistant possui uma integração oficial nativa com a Tuya que importa todos os seus dispositivos via nuvem de forma automática. No entanto, para máxima estabilidade e alinhamento com as boas práticas de 2026, recomendamos migrar gradativamente para dispositivos Zigbee, Thread ou Wi-Fi locais (com firmware ESPHome, Tasmota ou Shelly).
O que acontece se o servidor central do Home Assistant quebrar ou desligar?
Se o servidor sofrer uma falha física ou falta de energia (e você não possuir um no-break/UPS), as automações inteligentes centralizadas serão interrompidas. Contudo, interruptores físicos convencionais montados em paralelo ou relés com comandos manuais continuam operando normalmente a iluminação básica da residência, garantindo segurança operacional mínima para a família (Wife Acceptance Factor).
Conclusão
O Home Assistant consolidou-se não apenas como uma ferramenta para hobistas, mas como a espinha dorsal de qualquer projeto sério de automação residencial contemporâneo. Ao priorizar o controle local, ele protege seu bolso contra obsolescências repentinas, blinda sua privacidade contra a coleta abusiva de metadados e garante uma velocidade de resposta incomparável a ecossistemas baseados puramente em servidores remotos. Investir tempo na configuração de uma instância local do Home Assistant é garantir que a sua casa inteligente permaneça inteligente, funcional e estritamente sob o seu comando pelos próximos anos.
Gostou deste guia avançado de infraestrutura residencial? Não pare a sua evolução por aqui. Se você deseja dominar o auto-armazenamento de dados, servidores locais e criar uma infraestrutura tecnológica indestrutível dentro da sua própria casa, clique no link abaixo para explorar nosso hub completo de tutoriais:
👉 Explore mais Guias Avançados de Homelab & Self-Hosting aqui!